As a contributor, author, or editor on Woculus.com, you will be able to upload your posts and submit them for review. Following this, the editor of Woculus or the administrator will schedule the post to be posted after checking if it meets the Woculus standard.
Very importantly, ensure you have completely finished polishing the article before submitting it for review. Otherwise, Save Draft on the blog until you have finished your editing, and then Submit for Review.
Steps to Submitting Your Post for Review
Below are the basic steps:
1. Log in to Your Dashboard
Log in to your dashboard on Woculus.com using your username and password, provided earlier.
Click on Woculus Login Page or copy and paste https://woculus.com/wp-admin/ in your browser to get to the login page. Your login page should look like this:
Enter your username in the space provided (where you see the arrow “a” pointing to), and then your password in the next space (where arrow “b” is pointing to). Remember to tick the square box for “Remember me” so that you don’t have to repeat this process every time you are logging in.
If you don’t remember your password, click on “Lost your password?”; and you will be emailed a link to reset your password.
If you have not received your username and password, please send a complaint to the administrator of Woculus.com.
2. Select “Add New” from the Post Tab in the Dashboard
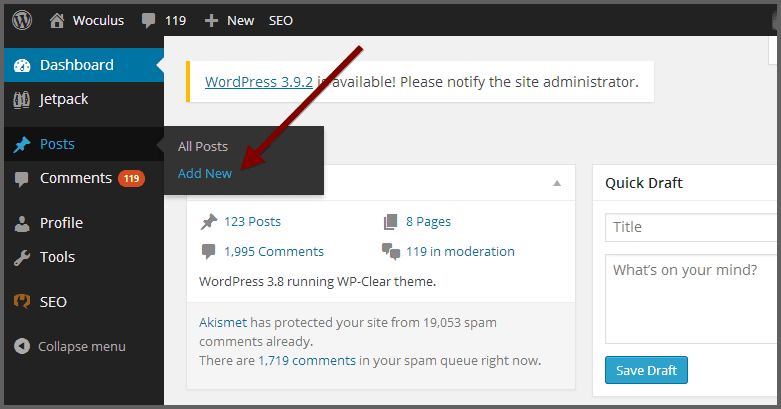
The post tab is the third on the left hand side of your dashboard. Move your cursor over it, and two sub-categories will show. Select “Add New” as seen below:
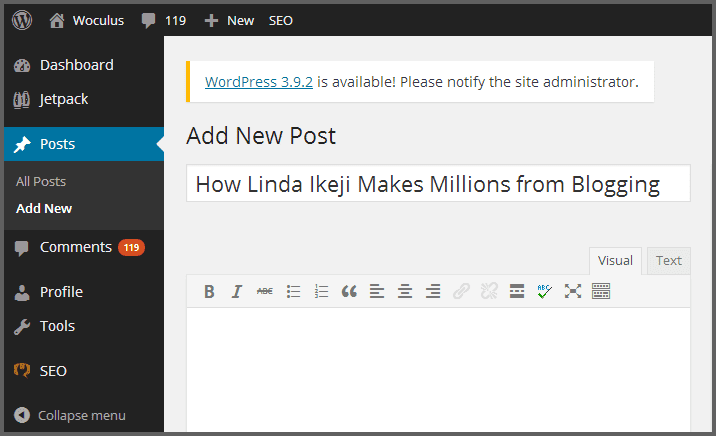
This will take you to the posting page where you can add your post contents.
3. Enter Your Post
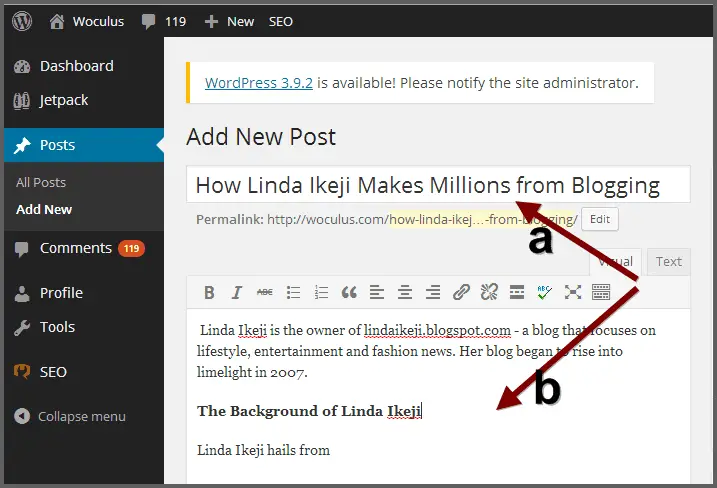
First, enter the topic of the article in the space where you see “Enter Your Title”. Then start entering your contents in the bigger box below.
An easy way around is to copy the contents from your Ms Word (highlight the content, right-click and select copy) and paste in the WordPress editor (right-click and select paste).
4. Enter Correct Tags and Category
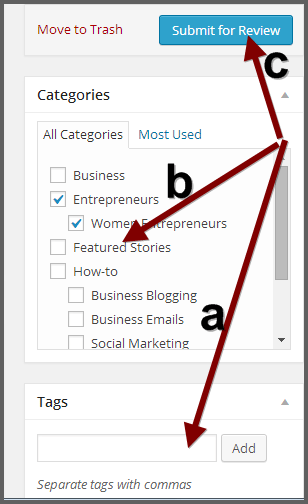
Tags are like synonyms of the major keywords in the article or other major relevant words or phrases for the article in question. For example, the tags that would be relevant to the topic in the illustration above are publisher, blogger, bella naija, entrepreneur etc.
If you are not sure which tags to use, just leave the space blank.
Make sure you select a relevant category by ticking the relevant box(es). Again if you are not sure of the correct category, simply leave the boxes empty.
5. Upload a Featured Picture
Relevant pictures make posts more readable. That’s why it is important to find a picture that’s relevant to your post and upload it under “Set Featured Image”.
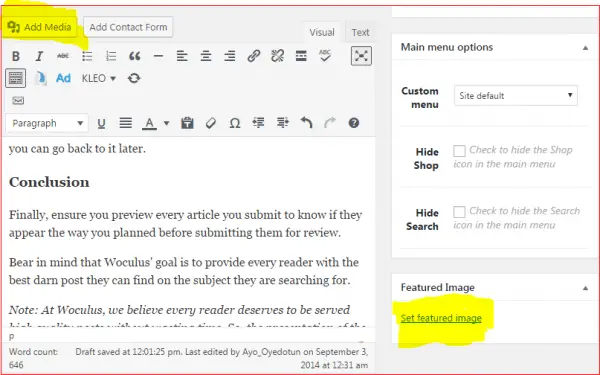
When you are ready to upload a picture from your computer, click on the tab for “Set Featured Image” and select the picture from your computer.
Once the picture uploads, you will see a page like this:
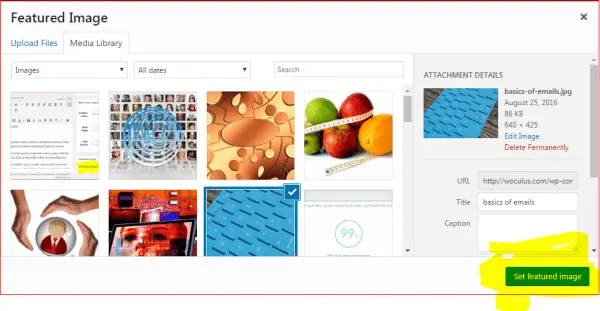
Please note that we do not use random pictures from Google Images or any other website on Woculus.com. We accept pictures from Pixabay or other sites that provide free pictures with no attrition.
Uploading Additional Images to Your Post
You can upload additional pictures with the tab “Add Media” – as seen in the screen shot above. First, ensure you click on the point where you want the picture to appear. Once you have done that, and the cursor appears there, click on Add media at the top of the WordPress task bar to select the picture.
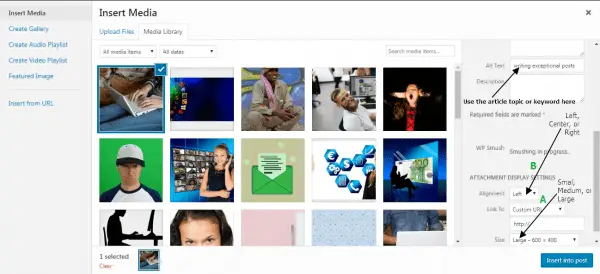
Next, select the dimension you want – small, medium, or large (we mostly use “large” to keep the article uncluttered).
6. Set the Correct Font Sizes for Headings & Subheadings
Did you notice how the headings and subheadings on this site are in different font sizes? This is the last thing you should do before submitting your article for posting.

Locate the various headings and subheadings in your post. Highlight and select the correct font size for each of them.
We often use Heading 3 for most subheadings. For example, all the subheadings 1 to 7 in this post are “Heading 3”.
Heading 2 is bigger than “Heading 3”. It is useful where you have a general subheading before the “Heading 3” subheadings. For example, “Steps to Submitting Your Post for Review” at the top of this post is Heading 2.
Headings 4,5, and 6 are lower subheadings accordingly, while “paragraph” is the normal font.
7. “Submit for Review” or “Save Draft”
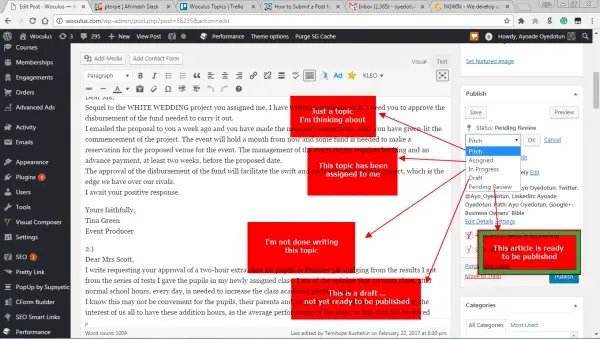
It is very important that you preview your posts before final submission for review even though you can preview afterward also. This will help you see exactly how your article will appear on the browser when it is finally posted.
Depending on what you see in the preview, you can do some more tweaking and modifications until you get something nice.
Before you submit an article for review, ensure you have thoroughly dealt with it, ensuring it is grammatically and logically sound. You have various options to choose from (as seen in the picture above) before saving your article as “pending review”.
If you are still working on the article, select “Draft” so that you can go back to it later. This means that the General Editor will be primarily concerned with articles saved under “pending review”.
Once an article is saved as “pending review”, it means that the general editor of Woculus is free to schedule the post for an appropriate date. If the article is not yet fit for publishing, set the “status” to any of the other options accordingly.
More Options
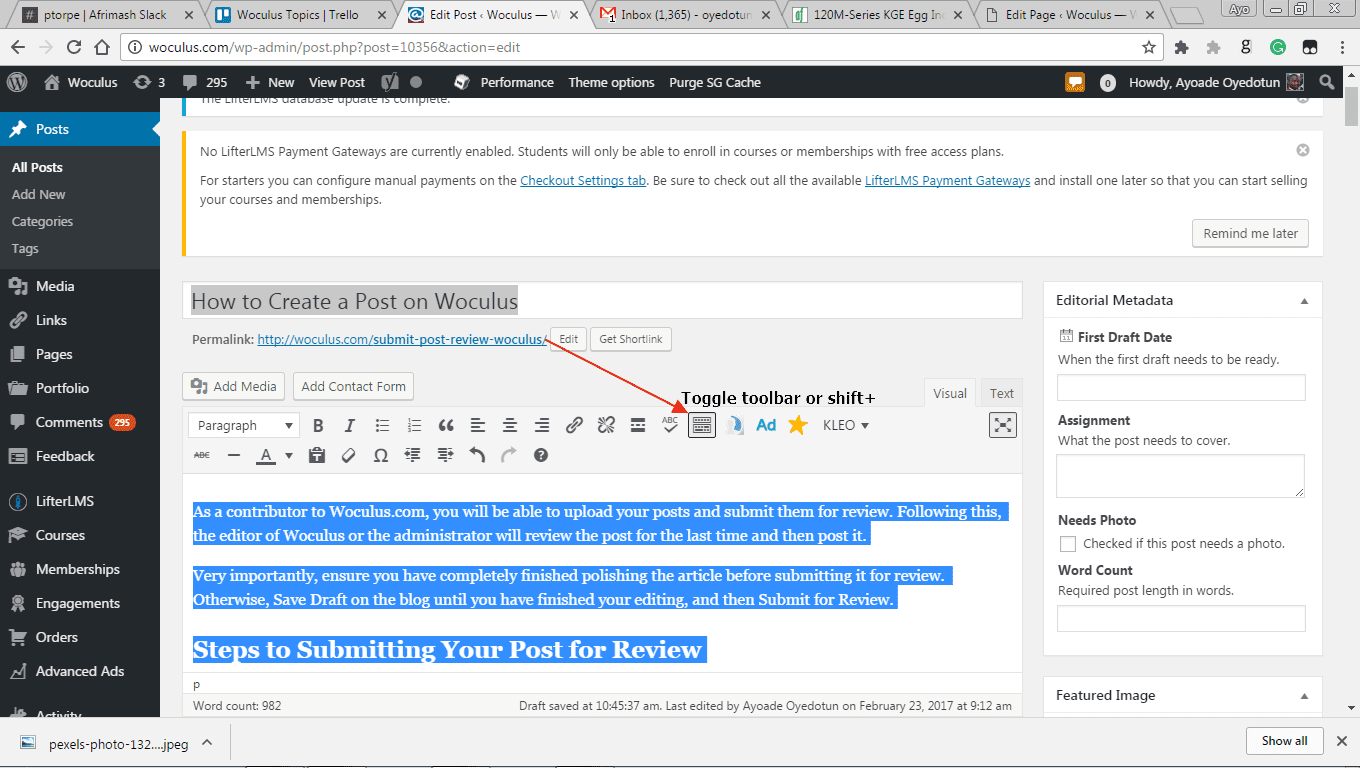
Kindly take your time to understand the work of the tabs at the top of the editor. Sometimes, half of the tabs will not show. To enable them to show, simply hold shift+alt+Z or click the “toggle” button as seen below.
How to Increase Indent (for email examples)
When the complete taskbar is open, you will see two buttons for “decrease indent” and “increase indent”. Depending on which side you want the highlighted text to move to, you will select one of the buttons.
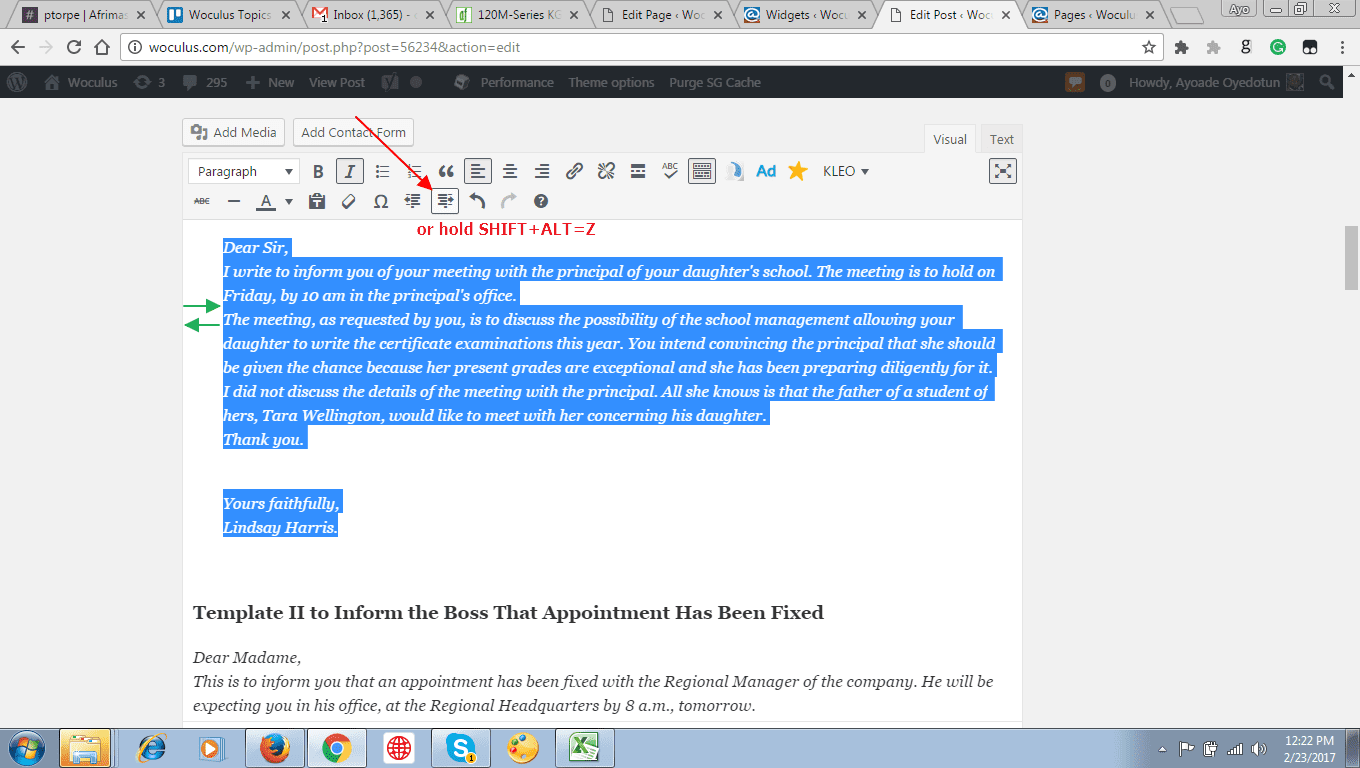
For email examples, we normally use “increase indent” after highlighting the email examples alone.
Conclusion
Finally, ensure you preview every article you submit to know if they appear the way you planned before submitting them for review.
Bear in mind that Woculus’ goal is to provide every reader with the best darn post they can find on the subject they are searching for.
Note: At Woculus, we believe every reader deserves to be served high-quality posts without wasting time. So, the presentation of the post is almost as important as the quality of the content.

